這篇文章主要介紹了linux下centos7安裝mysql5.7.19的教程詳解,需要的朋友可以參考下
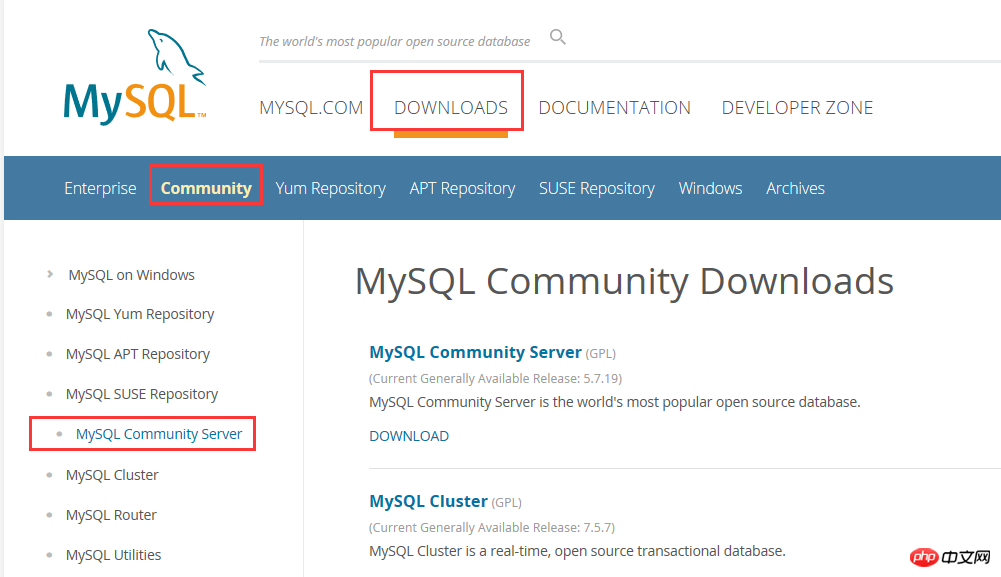
1.下載mysql

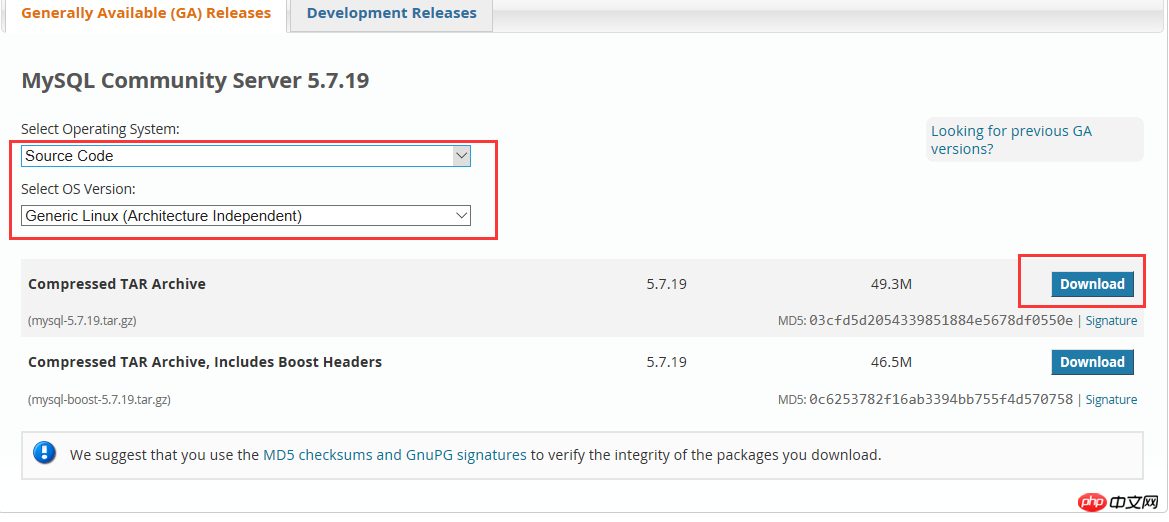
2.選擇源碼包,通用版點擊下載

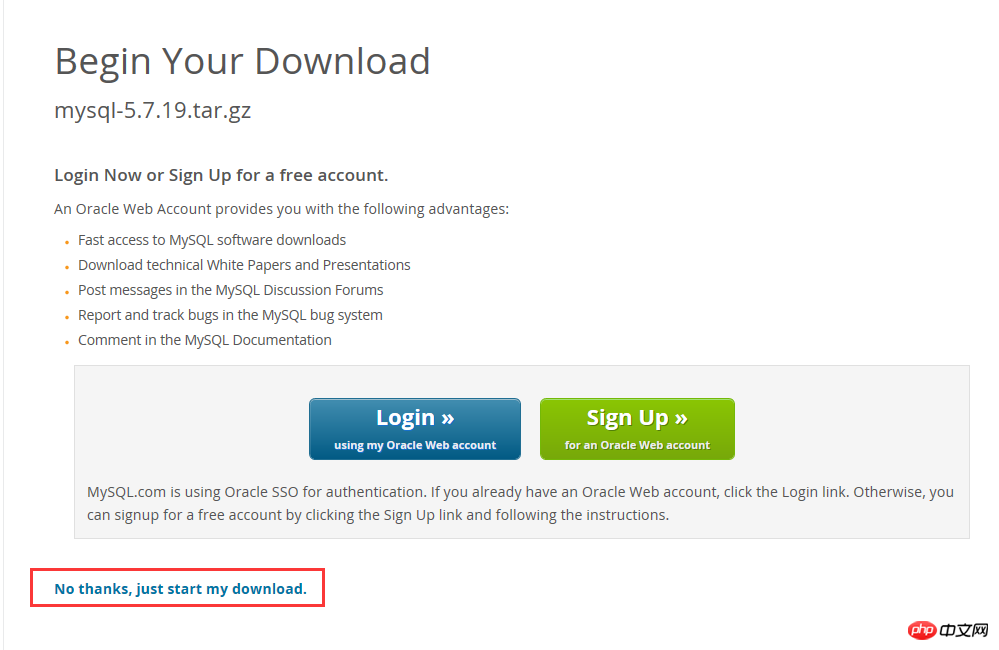
直接下載就可以了,不用登錄

3.解壓編譯
tar?-zxvf?mysql-5.7.19.tar.gz cd?mysql-5.7.19.tar.gz
創建數據目錄? mkdir -p /data/mysql
先用cmake編譯,沒有這個命令需要先yum安裝
cmake?-DCMAKE_INSTALL_PREFIX=/usr/local/mysql/??#這個是編譯安裝之后的mysql目錄所在地,可自行更改 -DMYSQL_DATADIR=/data/mysql/????#這個指向數據目錄 -DMYSQL_UNIX_ADDR=/tmp/mysql.sock -DSYSCONFDIR=/usr/local/mysql-5.7/conf/ -DWITH_MYISAM_STORAGE_ENGINE=1 -DWITH_INNOBASE_STORAGE_ENGINE=1 -DWITH_BLACKHOLE_STORAGE_ENGINE=1 -DWITH_ARCHIVE_STORAGE_ENGINE=1 -DWITH_MEMORY_STORAGE_ENGINE=1 -DWITH_READLINE=1 -DMYSQL_TCP_PORT=3306 -DENABLED_LOCAL_INFILE=1 -DDEFAULT_CHARSET=utf8 -DDEFAULT_COLLATION=utf8_general_ci -DMYSQL_USER=mysql -DWITH_SSL=system -DWITH_ZLIB=system?-DDOWNLOAD_BOOST=1?-DWITH_BOOST=/usr/local/boost?#從MySQL?5.7.5開始Boost庫是必需安裝的
編譯之后make && make install? 漫長的等待….之后就安裝完成了
安裝完成之后路徑/usr/local/ 下面會有一個目錄 mysql,這個目錄就是我編譯安裝設置的路徑-
DCMAKE_INSTALL_PREFIX=/usr/local/mysql/
一般為了安全起見,我們都會創建一個mysql用戶和mysql組,執行以下命令
#添加用戶組 groupadd?mysql #添加用戶mysql?到用戶組mysql useradd -g?mysql?mysql
給予mysql權限
chown?-R?mysql:mysql?mysql #添加用戶組 groupadd?mysql #添加用戶mysql?到用戶組mysql useradd?-g?mysql?mysql
給予mysql權限
chown?-R?mysql:mysql?mysql
4.接下來配置啟動向,設置開機啟動
配置/ect/my.cnf,如果沒有my.cnf可自行新建添加 ,? 僅供參考
[client] ort?=?3306 ocket?=?/tmp/mysql.sock default-character-set?=?utf8mb4 [mysqld] ort?=?3306 ocket?=?/tmp/mysql.sock asedir?=?/usr/local/mysql datadir?=?/data/mysql id-file?=?/data/mysql/mysql.pid user?=?mysql ind-address?=?0.0.0.0 erver-id?=?1 init-connect?=?'SET?NAMES?utf8mb4' character-set-server?=?utf8mb4 #skip-name-resolve #skip-networking ack_log?=?300 max_connections?=?1000 max_connect_errors?=?6000 open_files_limit?=?65535 table_open_cache?=?128 max_allowed_packet?=?4M inlog_cache_size?=?1M max_heap_table_size?=?8M tmp_table_size?=?16M read_buffer_size?=?2M read_rnd_buffer_size?=?8M ort_buffer_size?=?8M join_buffer_size?=?8M key_buffer_size?=?4M thread_cache_size?=?8 query_cache_type?=?1 query_cache_size?=?8M query_cache_limit?=?2M ft_min_word_len?=?4 log_bin?=?mysql-bi inlog_format?=?mixed expire_logs_days?=?30 log_error?=?/data/mysql/mysql-error.log low_query_log?=?1 long_query_time?=?1 low_query_log_file?=?/data/mysql/mysql-slow.log erformance_schema?=?0 explicit_defaults_for_timestam #lower_case_table_names?=?1 kip-external-locking default_storage_engine?=?InnoDB #default-storage-engine?=?MyISAM innodb_file_per_table?=?1 innodb_open_files?=?500 innodb_buffer_pool_size?=?64M innodb_write_io_threads?=?4 innodb_read_io_threads?=?4 innodb_thread_concurrency?=?0 innodb_purge_threads?=?1 innodb_flush_log_at_trx_commit?=?2 innodb_log_buffer_size?=?2M innodb_log_file_size?=?32M innodb_log_files_in_group?=?3 innodb_max_dirty_pages_pct?=?90 innodb_lock_wait_timeout?=?120 ulk_insert_buffer_size?=?8M myisam_sort_buffer_size?=?8M myisam_max_sort_file_size?=?10G myisam_repair_threads?=?1 interactive_timeout?=?28800 wait_timeout?=?28800 [mysqldump] quick max_allowed_packet?=?16M [myisamchk] key_buffer_size?=?8M ort_buffer_size?=?8M read_buffer?=?4M write_buffer?=?4M
接下來就執行初始化數據庫語句:
注意 mysql_install_db 已經不再推薦使用了,建議改成 mysqld –initialize 完成實例初始化。
/usr/local/mysql/bin/mysqld?--initialize-insecure?--user=mysql?--basedir=/usr/local/mysql?--datadir=/data/mysql
這步很重要,如果沒有初始化直接啟動數據庫會報錯
ERROR! The server quit without updating PID file (/data/mysql/mysql.pid).
如果初始化失敗或者報以下錯誤,就需要先清空你的/data/mysql目錄了,因為mysql目錄下面有數據所以初始化執行中止。
2017-08-29T13:39:47.241469Z 0 [ERROR] –initialize specified but the data directory has files in it. Aborting.2017-08-29T13:39:47.241536Z 0 [ERROR] Aborting
清空之后再重新初始化
/usr/local/mysql/bin/mysqld?--initialize-insecure?--user=mysql?--basedir=/usr/local/mysql?--datadir=/data/mysql
接下來可以啟動mysql了
ervice?mysqld?start
登錄測試
/usr/local/mysql/bin/mysql?-uroot?-
因為初始化–initialize-insecure 是默認沒有密碼的所以密碼不用輸入直接確定就行了;
假如登錄報錯
ERROR?2002?(HY000):?Can't?connect?to?local?MySQL?server?through?socket?'/tmp/mysql.sock'?(2)
檢查一下你啟動數據庫成功沒? 可執行? ps -ef | grep mysql? 看看進程是不是啟動狀態
空密碼不安全所以我們還要設置密碼,下面命令中的”root”就是設置密碼區域,我的密碼設置為root,可自行修改
[root@localhost?local]#?/usr/local/mysql/bin/mysql?-e?"grant?all?privileges?on?*.*?to?root@'127.0.0.1'?identified?by?"root"?with?grant?option;"[root@localhost?local]#?/usr/local/mysql/bin/mysql?-e?"grant?all?privileges?on?*.*?to?root@'localhost'?identified?by?"root"?with?grant?option;"
接下來再登錄測試一次密碼修改成功沒有就完成啦!
總結


