本篇文章給大家介紹一下atom實現塊注釋(/* */)的方法,了解塊注釋插件multi-comment的安裝和使用。有一定的參考價值,有需要的朋友可以參考一下,希望對大家有所幫助。

相關推薦:《atom》
Atom插件:multi-comment
1. Atom – Multi-comment簡介:
a block-comment module built with the focus to interact with the default line-comment-command.翻譯為:使用焦點構建的塊注釋模塊,用于與默認的行注釋命令交互。
2. multi-comment插件的安裝
-
打開Atom,在菜單欄以此打開:Packages(擴展) >> Setting View(設置界面) >> Install Packages/Themes(安裝 插件/主題),即可 進入插件/主題安裝界面。
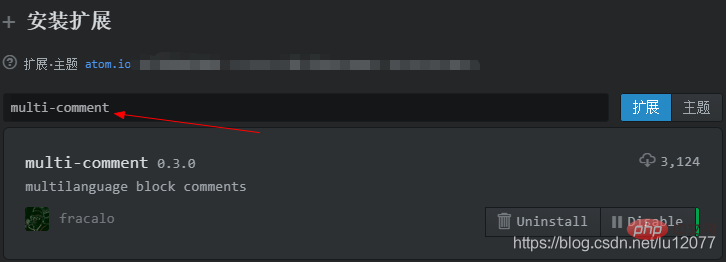
- 在 插件/主題安裝界面 中 搜索 multi-comment,然后點擊 Install(安裝)如下圖(已安裝):
3. multi-comment插件的改造
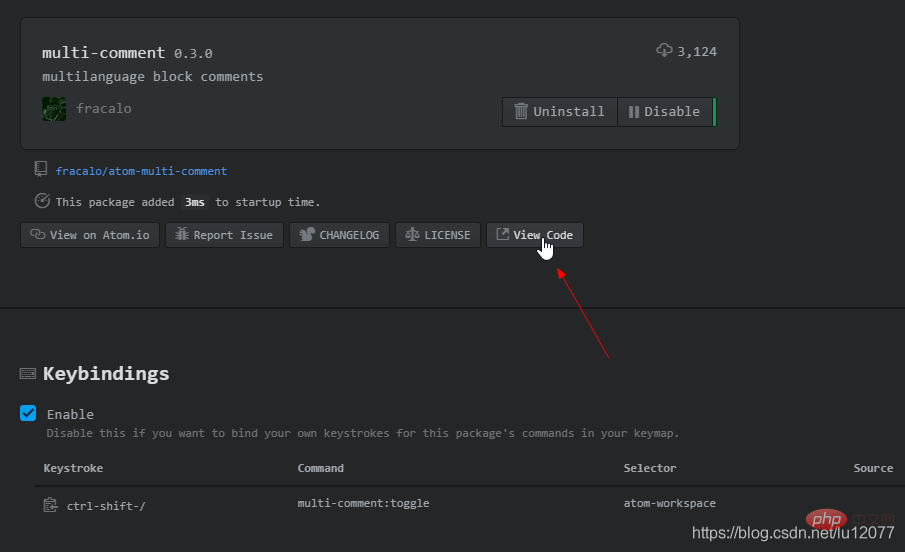
- 首先,在上圖中 點擊插件 空白區域,進入插件設置界面,然后點擊 View Code,如下圖:
點擊之后的界面如下圖: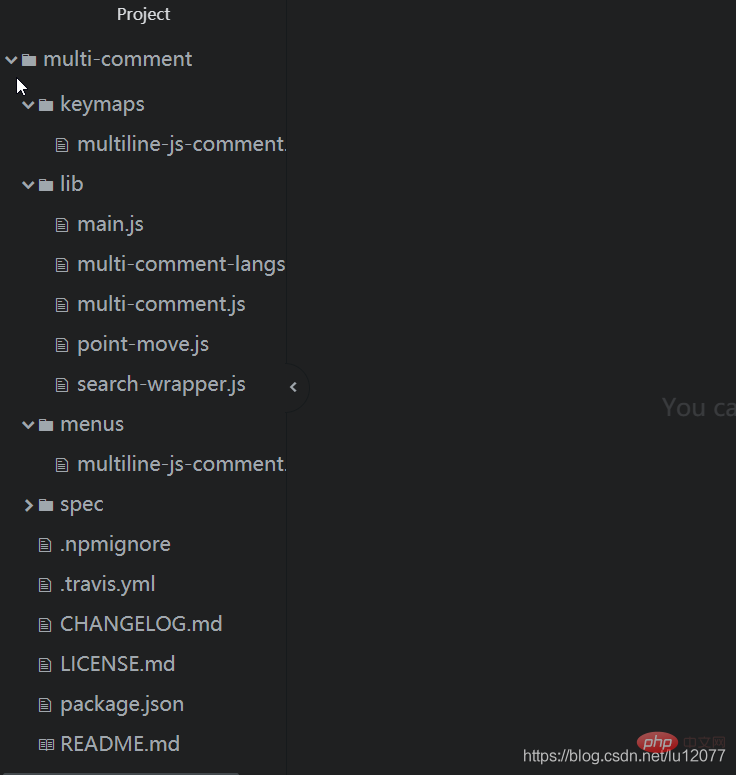
1. 默認的塊注釋 快捷鍵 修改為:Ctrl + Shift + /
- 打開項目中的 keymapsmultiline-js-comment.json 文件
-
- 修改快捷鍵為:“ctrl-shift-/”,如下代碼:
{ "atom-workspace": { "ctrl-shift-/": "multi-comment:toggle" }}
- 保存代碼
-
- 快捷鍵 Ctrl+S保存。
2. 修改默認 注釋符 開始標記 /* 后 和 結束標記 */ 前 分別多加了1個空格。
- 打開項目中的 libmulti-comment-langs.js 文件
-
- 修改如下代碼中的openToken (設置 塊注釋開始標記)和 closeToken(設置 塊注釋結束標記),并保存:
const languages = [ { name: 'coffeescript', test: /^source.coffee.?/, openToken: '###', closeToken: '###', /* when used at line start line-scoprDescriptor will override so we cheat with leading */ option: { tab: 't' } }, { name: 'javascript', test: /^source.js.?/, openToken: '/*', closeToken: '*/' }, { name: 'java', test: /^source.java.?/, openToken: '/*', closeToken: '*/' }, { name: 'css', test: /^source.css.?/, openToken: '/*', closeToken: '*/', option: { scanInside: true } }, { name: 'php', test: /html.php/, openToken: '/* ', closeToken: ' */' }, { name: 'ruby', test: /^source.ruby.?/, openToken: '=begin', closeToken: '=end', option: { newline: 'n' } }, { name: 'c', test: /^source.c.?/, openToken: '/*', closeToken: '*/' }];
- 本例中:
-
- 修改的是PHP語言的。
3. 修改 使用快捷鍵注釋后的光標效果
- multi-comment插件 注釋 選中的內容,發現注釋后光標進行了移動(自然的,注釋內容選中也就取消了),于是:
-
- 在項目中 找到 libmulti-comment.js 文件在 發現如下代碼中 // set cursor position 即最后兩行代碼 進行了光標移動的操作。
addComment() { const range = this.editor.getSelectedBufferRange(); const text = this.editor.getTextInBufferRange(range); const [open, close] = (this.lang.commentTokens.option && this.lang.commentTokens.option.newline) ? [` ${this.lang.commentTokens.open} `, ` ${this.lang.commentTokens.close} `] : (this.lang.commentTokens.option && this.lang.commentTokens.option.tab) ? [` ${this.lang.commentTokens.open}`, ` ${this.lang.commentTokens.close}`] : [this.lang.commentTokens.open, this.lang.commentTokens.close]; this.editor.setTextInBufferRange(range, `${open}${text}${close}`); // set cursor position const landPosition = pointMove(this.editor.getCursorBufferPosition(), - (close.length - 1), this.editor); this.editor.setCursorBufferPosition(landPosition); }
- 將其以上兩行代碼注釋后,發現另外一個問題:在空白行 即沒有選中內容的情況下,直接生成注釋后,光標沒有跳轉到 注釋開始標記 與 結束標記的中間,解決辦法:
-
- 將最后兩行代碼進行如下改造,并保存:
將代碼:
// set cursor position const landPosition = pointMove(this.editor.getCursorBufferPosition(), - (close.length - 1), this.editor); this.editor.setCursorBufferPosition(landPosition);
修改為:
if (text === '') { // set cursor position const landPosition = pointMove(this.editor.getCursorBufferPosition(), - (close.length - 1), this.editor); this.editor.setCursorBufferPosition(landPosition); }
加粗樣式完成以上修改工作后,想要的插件的效果還沒有在Atom中立刻生效,因此需要 先關閉Atom,并重新打開。
此時想要的插件的效果就實現了。
更多編程相關知識,請訪問:atom!!
? 版權聲明
文章版權歸作者所有,未經允許請勿轉載。
THE END


